Scratch-building for beginners - page 5
Ok, let's glue that shell together!
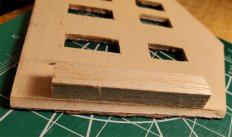
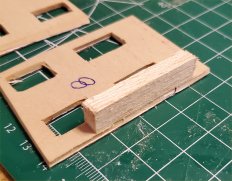
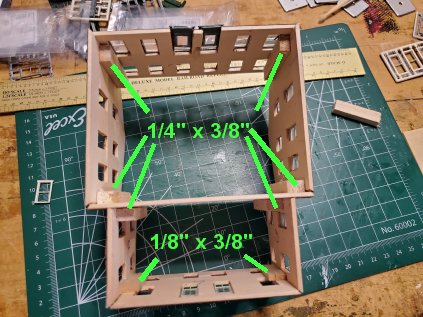
Begin by cutting several short pieces of 1/4" x 3/8" and 1/8" x 1/4" balsa or basswood (I made the mistake of using 1/8" x 3/8" bracing on walls 6,7, and 8 and the bracing showed through the windows) to serve as inside corner bracing; you will need as many pieces of bracing as there are corners - inside and outside - as there are on your building. Aunt Estelel's House has 8 corners.
Next (please refer to the pictures while reading this, because it may get kinda confusing), on the back of the front of the building, glue a corner brace to each side, aligning the brace with the top of the mitered edge (or, if you used butt joints, to edge of the wall). Now attach the side walls by applying glue to the side of the corner brace that will be against the adjoining wall, as well as along the mitered or butt edge of the wall. Be sure the walls - and I cannot emphasize this enough - meet at 90 degrees, then set the assembly aside to dry. Also remember to align the TOP of the front wall with the tops of the side walls.
|
|
|
|
||||||||
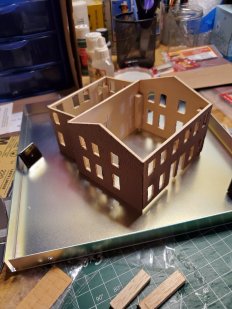
Build walls 1, 3, 4, and 5 as one subassembly and walls 6, 7, and 8 as a separate subassembly. When both subassemblies are dry, connect them by putting a 2" length of 1/8" x 3/8" on the butt edge of walls 6 and 8 and gluing this subassembly to wall 4. Set this assembly aside to dry.
|
|
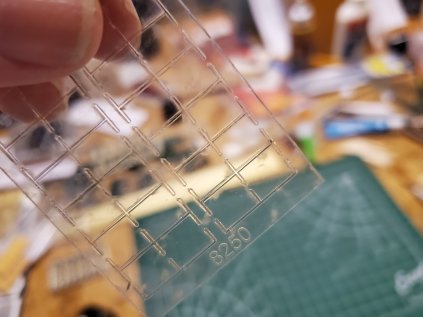
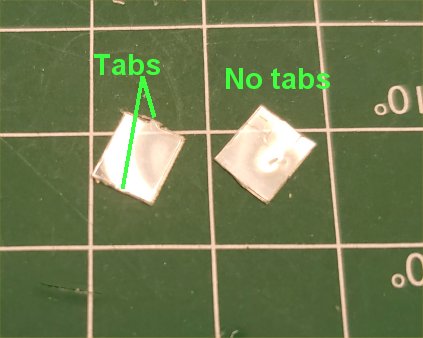
Next, install the glazing into the doors and windows. The glazing comes such that each piece of the glazing material is a "pane" of the window or door glass which fits into the recess inside the lip on the back of the window or door. Trim the glazing from the carrier strip closely, so that no tab protrudes from the edge - these tabs will interfere with the glazing fitting into the recess correctly.
Hint: The glazing material carrier has the item number of the door or window stamped on it so you can identify it; this is handy for when you need to match the glazing to the windows and doors after you paint the latter.
Finally, glue the windows and doors in place with super glue: apply a small dab of glue to the outside edge of the lip on the back of the casting and insert the window or door into its opening.
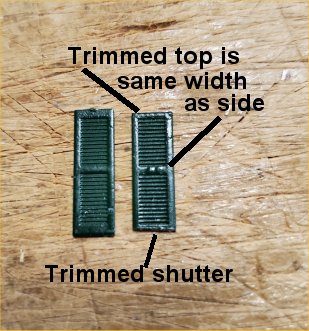
After the windows are glued into place it's time to install the shutters. The small shutters for the upstairs windows need to be trimmed at the top and bottom. Using a single-edged razor blade, trim the shutters so that the ends are the same width as the sides. Glue in place with super glue, aligning shutters as closely as possible with window panes.
|
| Previous | Next |
